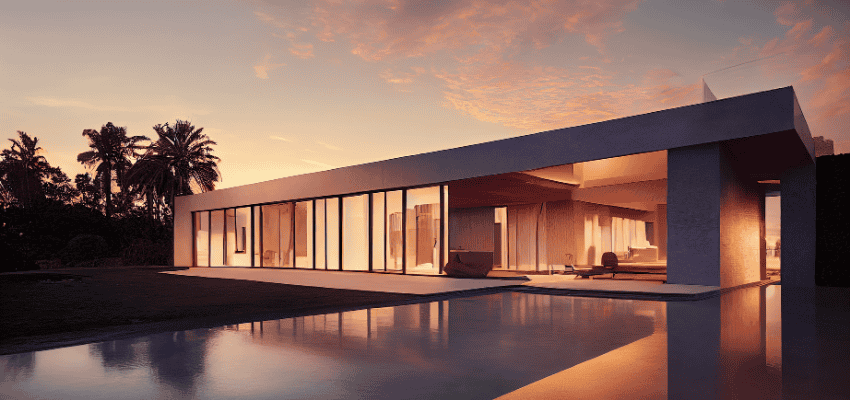
Architectural rendering is an essential part of the design process. It helps architects, designers, and clients visualize a project before it’s built. However, rendering can be time-consuming, especially when working on complex projects.
The good news is that there are ways to optimize your rendering workflow to save time and get faster results without sacrificing quality. In this article, we’ll explore practical tips and strategies to make your rendering process more efficient.
Plan Your Scene Before You Start
Before jumping into rendering, take time to plan your scene. This step is often overlooked, but it can save you a lot of time later. Ask yourself:
- What is the purpose of this rendering? (e.g., client presentation, marketing, design review)
- What are the key elements that need to stand out?
- What level of detail is required?
By answering these questions, you can focus on what’s important and avoid wasting time on unnecessary details. For example, if you’re rendering an exterior view of a building, you might not need to spend hours perfecting the interior details that won’t be visible.
Use Efficient 3D Models
The complexity of your 3D model has a direct impact on rendering time. Here’s how to keep your models efficient:
- Simplify Geometry: Use only the necessary polygons in your model. Avoid overly complex shapes that don’t add value to the final rendering.
- Use Proxy Objects: For complex objects like furniture or trees, use low-poly versions (proxies) during the rendering process. You can replace them with high-quality models later if needed.
- Clean Up Your Model: Remove any hidden or unused objects, layers, or materials that might slow down your software.
By keeping your models lightweight, you’ll reduce the computational load and speed up rendering times.
Optimize Textures and Materials
Textures and materials can make your renderings look realistic, but they can also slow down the process if not managed properly. Here’s how to optimize them:
- Use Appropriate Texture Sizes: Large, high-resolution textures can slow down rendering. Use textures that are just the right size for your project. For example, a texture that looks good up close doesn’t need to be ultra-high-resolution if it’s used in the background.
- Reuse Materials: If multiple objects in your scene use the same material, create one material and apply it to all of them. This reduces the number of materials your software has to process.
- Use Baked Textures: Baked textures are pre-rendered images that simulate lighting and shadows. They can save time by reducing the need for complex calculations during rendering.
Set Up Lighting Strategically
Lighting is one of the most important aspects of rendering, but it can also be one of the most time-consuming. Here’s how to optimize your lighting setup:
- Use Natural Light Whenever Possible: Natural light (like sunlight) is easier to render than artificial light sources. If your scene allows, rely on natural light to reduce rendering time.
- Limit the Number of Light Sources: Each light source adds to the rendering time. Use only the lights that are necessary to achieve the desired effect.
- Use Light Portals: If you’re rendering an interior scene with windows, use light portals to help the software understand where light is coming from. This can improve rendering speed and accuracy.
Choose the Right Rendering Settings
Rendering software often comes with a variety of settings that can affect both quality and speed. Here’s how to find the right balance:
- Lower Sample Rates: Sample rates determine how many times the software calculates light for each pixel. Lowering the sample rate can speed up rendering, but it may also introduce noise. Experiment to find a balance between speed and quality.
- Use Adaptive Sampling: Many rendering engines offer adaptive sampling, which focuses computational power on areas that need more detail. This can save time by reducing unnecessary calculations.
- Turn Off Unnecessary Features: Features like global illumination, caustics, and motion blur can add realism but also increase rendering time. Turn them off if they’re not essential for your project.
Use Post-Processing to Save Time
Not every detail needs to be perfect in the initial render. You can save time by fixing minor issues during post-processing. For example:
- Use software like Photoshop to adjust brightness, contrast, and color balance.
- Add effects like depth of field or lens flares in post-production instead of rendering them.
- Fix small imperfections like texture seams or lighting errors without re-rendering the entire scene.
Organize Your Files and Assets
A well-organized workflow can save you a lot of time and frustration. Here’s how to stay organized.
- Name Your Files Clearly: Use descriptive names for your files, layers, and materials. This makes it easier to find what you need later.
- Use Asset Libraries: Save commonly used materials, textures, and models in a library so you can reuse them in future projects.
- Keep Backups: Regularly save backups of your work to avoid losing progress due to software crashes or other issues.
Test Render Small Sections
Instead of rendering the entire scene at once, test render small sections to check for issues. This allows you to make adjustments without waiting for a full render. For example:
- Render a small area with complex lighting or materials to ensure it looks right.
- Use low-resolution test renders to check the overall composition and lighting before committing to a high-resolution render.
The Final Notes
Optimizing your rendering workflow doesn’t have to be complicated. By planning your scene, simplifying your models, optimizing textures and lighting, and using the right tools and techniques, you can significantly reduce rendering times without compromising on quality.
Remember, the goal is to work smarter, not harder. With these tips, you’ll be able to deliver stunning renderings faster and more efficiently, giving you more time to focus on what you love—creating amazing designs.

